Sorting data is one of the most common operations in Excel. When dealing with large tables, sorting by just one column is often insufficient. For example, we might want to sort a list of payments first by branch name, then by date, and finally by amount.
In this article, you will learn how to automate this type of multi-level sorting using VBA.
📑 Table of Contents
1. Sample Data and the Need for Multi-Level Sorting
Assume we have a table of payments:
| Branch | Payment Date | Amount |
|---|---|---|
| Berlin | 4/7/2025 | 1,200,000 |
| Berlin | 4/9/2025 | 950,000 |
| Berlin | 4/9/2025 | 2,200,000 |
| London | 3/30/2025 | 1,500,000 |
| London | 3/30/2025 | 3,000,000 |
| London | 4/4/2025 | 2,500,000 |
| London | 4/4/2025 | 4,000,000 |
| New York | 3/30/2025 | 1,200,000 |
| New York | 3/30/2025 | 3,200,000 |
| New York | 4/1/2025 | 2,800,000 |
If we sort based on only one column (e.g., by date), the data will still be scattered. However, with multi-level sorting, we can first group the data by branch, then by date within each branch, and finally by amount.
2. Manual Multi-Level Sorting Method
Multi-level sorting is also possible manually in Excel. The best way to do this is by using the Table feature. The reason for this recommendation is that when data is converted into a table, the data range becomes dynamic, meaning if new rows are added to the table, they will be included in the sort.
Additionally, tables automatically enable filter and quick sort options in the column headers and make the data appearance clearer. Therefore, if sorting and filtering are performed regularly, it is recommended to first convert your data into a table.
2.1. Converting a Data Range to a Table
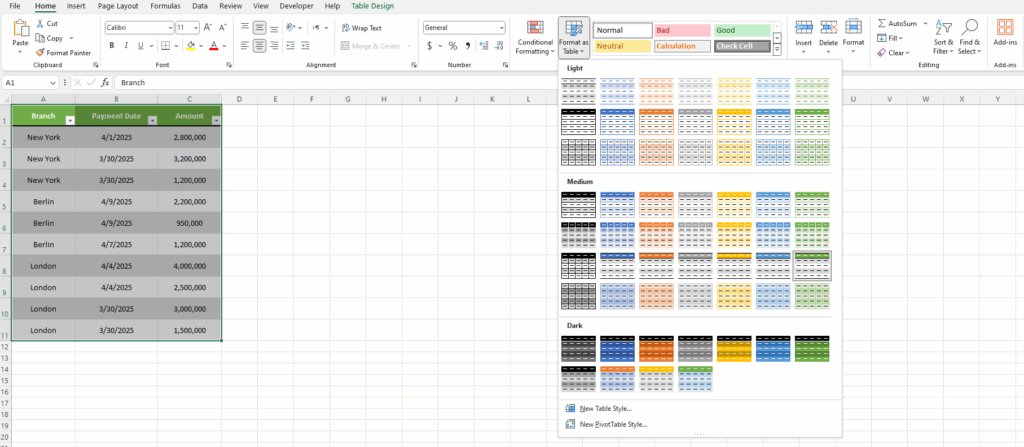
- From the Home tab, click on Format as Table and select your desired style from the menu.
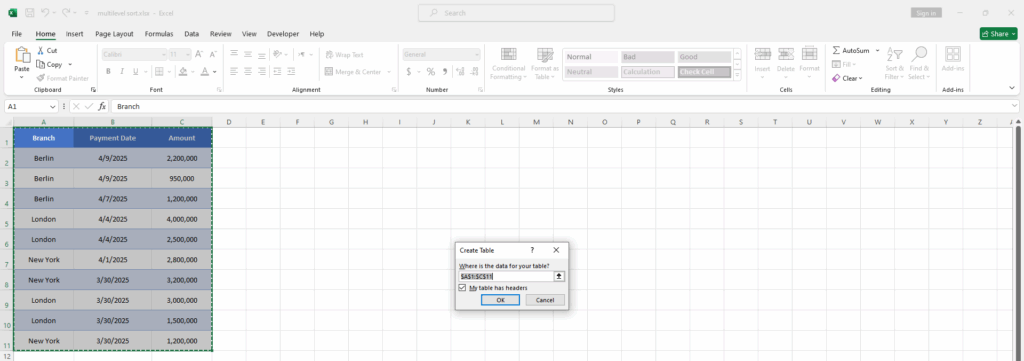
- In the window that appears, select the data range (including the header row) and check the My table has headers box.
- Click the OK button.
2.2. Adding Sort Levels via the Home Tab’s Sort & Filter Menu in Excel
After converting to a table, you can perform multi-level sorting as follows:
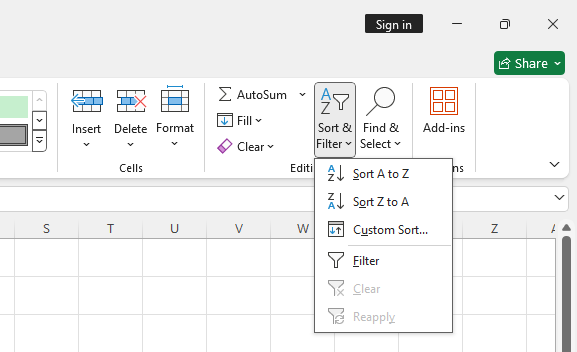
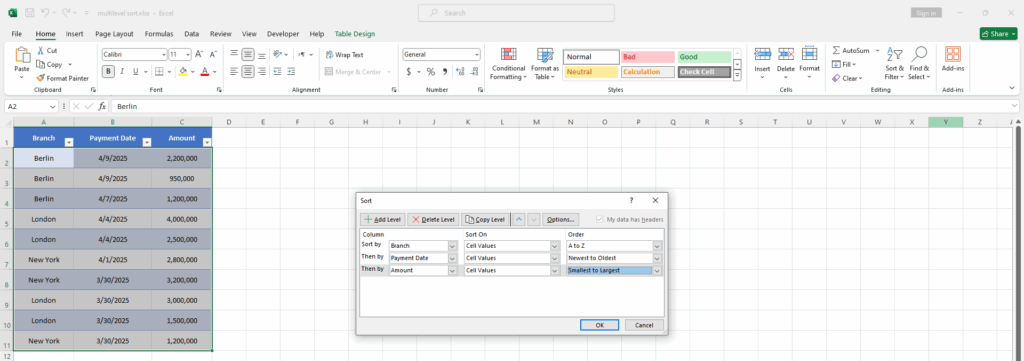
- In the Home tab, in the Editing section, click on the Sort & Filter option and then select Custom Sort….
- In the window that opens:
- In the Column section, select the first sort column (e.g., “Branch”).
- In the Sort On section, leave the default value as Cell Values.
- In the Order section, specify the sort order (A → Z or Z → A).
- Click Add Level to add another level.
- In the Column section, select the second sort column (e.g., “Payment Date”).
- Similar to the first column, in the Sort On section, leave the default value as Cell Values.
- In the Order section, select Oldest to Newest or Newest to Oldest.
- Similar to the first and second columns, add the third column (e.g., “Amount”) to the Sort.
- If needed, you can add more columns using Add Level.
- After completing the settings, click OK to sort the data.
3. Automatic Method with VBA
The manual method seems simple and practical at first glance, but if this task needs to be done daily and in large volumes, it can become tedious. To automate sorting, we can use VBA. In this method, data is sorted in a specified order.
3.1. Defining Required Variables
Dim ws As Worksheet
Set ws = ThisWorkbook.Sheets("Payments")
In the first line, a variable named ws of type Worksheet (equivalent to an Excel sheet) is defined.
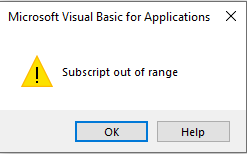
In the second line, the reference of the ws variable is assigned to a sheet named "Payments" using the ThisWorkbook object and the Sheets collection. Note that if a sheet named Payments does not exist in your Excel file, this line will cause a ‘Subscript out of range’ error.
3.2. Clearing Previous Sorts
ws.Sort.SortFields.ClearThis line clears any previous sort settings so new settings can be applied.
3.3. First Level Sort
ws.Sort.SortFields.Add Key:=ws.Range("A2:A1000"), Order:=xlAscendingIn this line, the first column (Branch) is selected as the first sort level and sorted in ascending (alphabetical) order. Note that the sort will be applied to the range A2:A1000.
3.4. Second Level Sort
ws.Sort.SortFields.Add Key:=ws.Range("B2:B1000"), Order:=xlAscendingHere, the Payment Date column is added as the second criterion, also in ascending order (oldest to newest).
3.5. Third Level Sort
ws.Sort.SortFields.Add Key:=ws.Range("C2:C1000"), Order:=xlAscendingThe Amount column is added as the third sort criterion.
3.6. Defining the Data Range
ws.Sort.SetRange Rng:=ws.Range("A1:C1000")In this step, we specify the range on which the sort should be applied. In this code, using the SetRange method of the Sort object, we select the range A1:C1000 as the sort range.
3.7. Specifying the First Row as the Header Row
ws.Sort.Header = xlYesIn this step, using the Header property of the Sort object, we specify that the first row of data contains header information.
3.8. Applying the Sort
ws.Sort.ApplyThe sort is applied using the Apply method.
3.9. Complete Macro
Sub MultiLevelSort()
    Dim ws As Worksheet
    Set ws = ThisWorkbook.Sheets("Payments")

    ws.Sort.SortFields.Clear
    ws.Sort.SortFields.Add Key:=ws.Range("A2:A1000"), Order:=xlAscending
    ws.Sort.SortFields.Add Key:=ws.Range("B2:B1000"), Order:=xlAscending
    ws.Sort.SortFields.Add Key:=ws.Range("C2:C1000"), Order:=xlAscending
    ws.Sort.SetRange ws.Range("A1:C1000")
    ws.Sort.Header = xlYes
    ws.Sort.Apply
End Sub
To complete the code and create a macro, we place the entire code inside a Sub routine named MultiLevelSort and save it in a standard module.
3.9.1. Steps to Create a Macro in VBA
- Go to the Developer menu and select the Visual Basic option. More information on how to enable the Developer menu can be found on the page How to Enable the Developer Tab in Excel?.
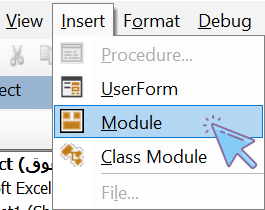
- From the Insert menu, select the Module option to create a new module. A visual tutorial on how to add a standard module in VBA can be found on the page Module in VBA.
4. Using xlAscending and xlDescending
In the macro above, we used xlAscending (ascending sort).
If we want a descending sort, we could save the same macro under a different name and replace xlAscending with xlDescending.
However, a better solution is to define a Private Subroutine that accepts the sort order as an argument.
4.1. Helper Sort Subroutine
Private Sub MultiLevelSortCustom(ByVal sortOrder As XlSortOrder)
    Dim ws As Worksheet
    Set ws = ThisWorkbook.Sheets("Payments")

    ws.Sort.SortFields.Clear
    ws.Sort.SortFields.Add Key:=ws.Range("A2:A1000"), Order:=sortOrder
    ws.Sort.SortFields.Add Key:=ws.Range("B2:B1000"), Order:=sortOrder
    ws.Sort.SortFields.Add Key:=ws.Range("C2:C1000"), Order:=sortOrder
    ws.Sort.SetRange ws.Range("A1:C1000")
    ws.Sort.Header = xlYes
    ws.Sort.Apply
End Sub
The MultiLevelSortCustom subroutine is a helper function that, thanks to its sortOrder argument, allows us to easily change the ascending/descending order of the multi-level sort. The reason for using Private in the MultiLevelSortCustom routine is that we do not want this routine to appear in the list of Excel macros.
4.2. Ascending Multi-Level Sort Macro
Sub MultiLevelSortAsc()
    MultiLevelSortCustom xlAscending
End Sub
Thanks to the MultiLevelSortCustom helper function, we created the ascending macro in one line.
4.3. Descending Multi-Level Sort Macro
Sub MultiLevelSortDesc()
    MultiLevelSortCustom xlDescending
End Sub
This way, we have two macros for ascending and descending sorting, and only one central function is maintained.
5. Running the Macro with a Sheet Button
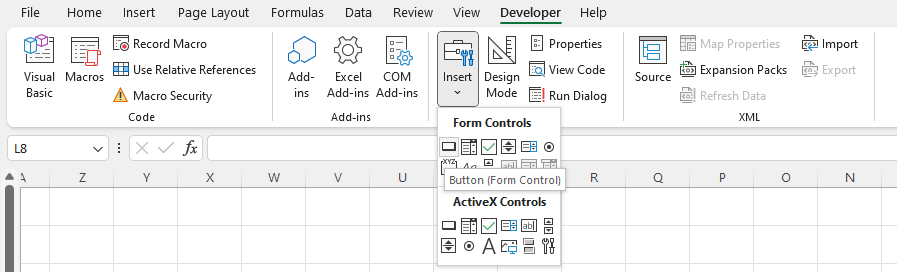
For convenience, you can place two buttons on the Excel sheet:
- Go to the Developer tab and from the Insert → Form Controls section, add a Button control to the sheet.
- Assign the
MultiLevelSortAscmacro to the first button and theMultiLevelSortDescmacro to the second button. - This allows the user to sort the data with just one click.
6. Tutorial Video: How to Perform Multi-Level Sorting in Excel Using VBA
In the following tutorial video, you can watch the steps of this guide from start to finish.
7. Download the Excel Tutorial File
Read More
How to Access Data from Another Excel File in VBA?
How to Convert Excel Files to PDF Using VBA?
Developer Tab in Excel | How to Enable the Developer Tab in Excel